Category: Integrations

Integration examples and tips for using AVstudio with other systems

  • Unlocking Smarter Security: DoorBird and AVstudio Integration

    Unlocking Smarter Security: DoorBird and AVstudio Integration

    In the realm of smart security and audiovisual control, two standout solutions – DoorBird and AVstudio – come together to create a seamless, powerful experience. DoorBird, crafted by Bird Home Automation GmbH, brings cutting-edge IP video intercoms to your doorstep, while AVstudio, developed by AVgator Inc., offers a robust platform to manage it all.

    In this blog post, we’ll explore how these two innovations pair up, with insights from our DoorBird Integration Guide, and why this combo is a must-have for homes and businesses alike.

    Meet DoorBird: The Intercom Innovator

    Hailing from Germany, Bird Home Automation GmbH has redefined door communication with DoorBird. These aren’t your average doorbells – they’re IP video door stations packed with features:

    • Crystal-clear video and two-way audio to see and speak with visitors.
    • Remote access via the DoorBird app, letting you manage your door from anywhere.
    • Smart integrations with platforms like Crestron, Control4, and, of course, AVstudio.

    Whether you’re screening deliveries at home or managing access for a multi-tenant building, DoorBird delivers security with style and sophistication.

    Enter AVstudio: The Control Mastermind

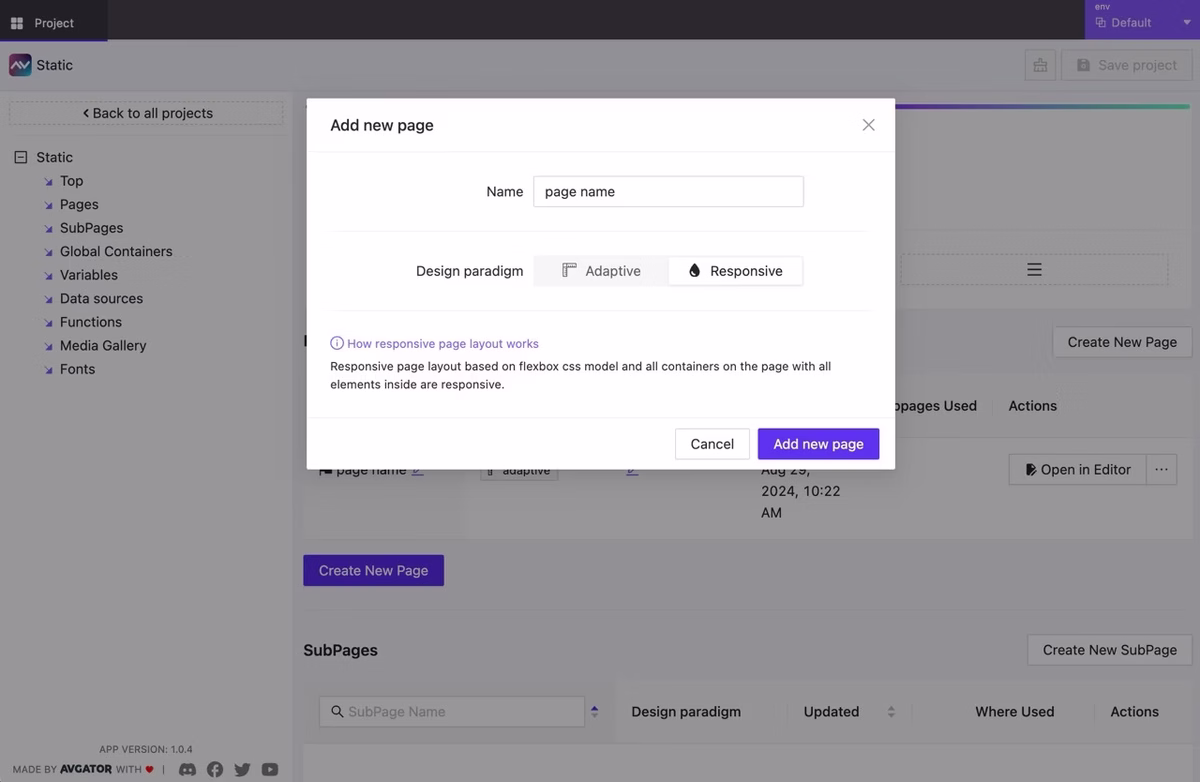
    On the software side, AVgator Inc., a Crestron Service Provider, brings us AVstudio – a game-changing platform for AV and smart system integration. AVstudio (accessible at avstudio.app) empowers users to:

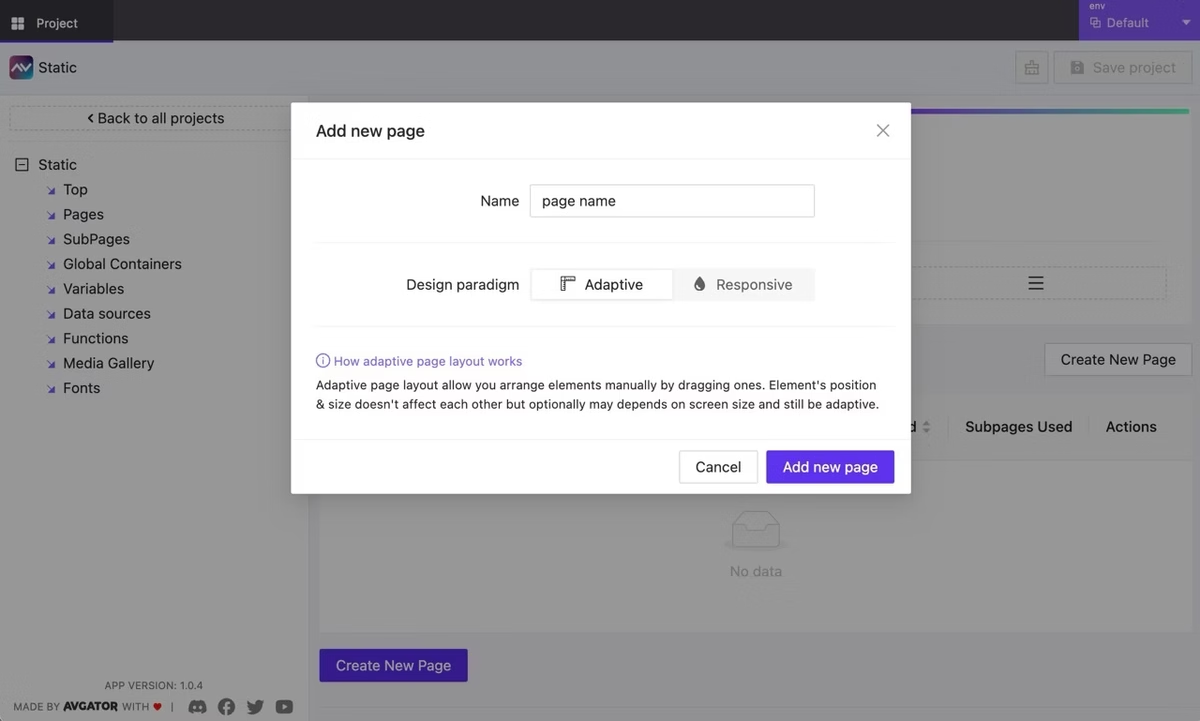
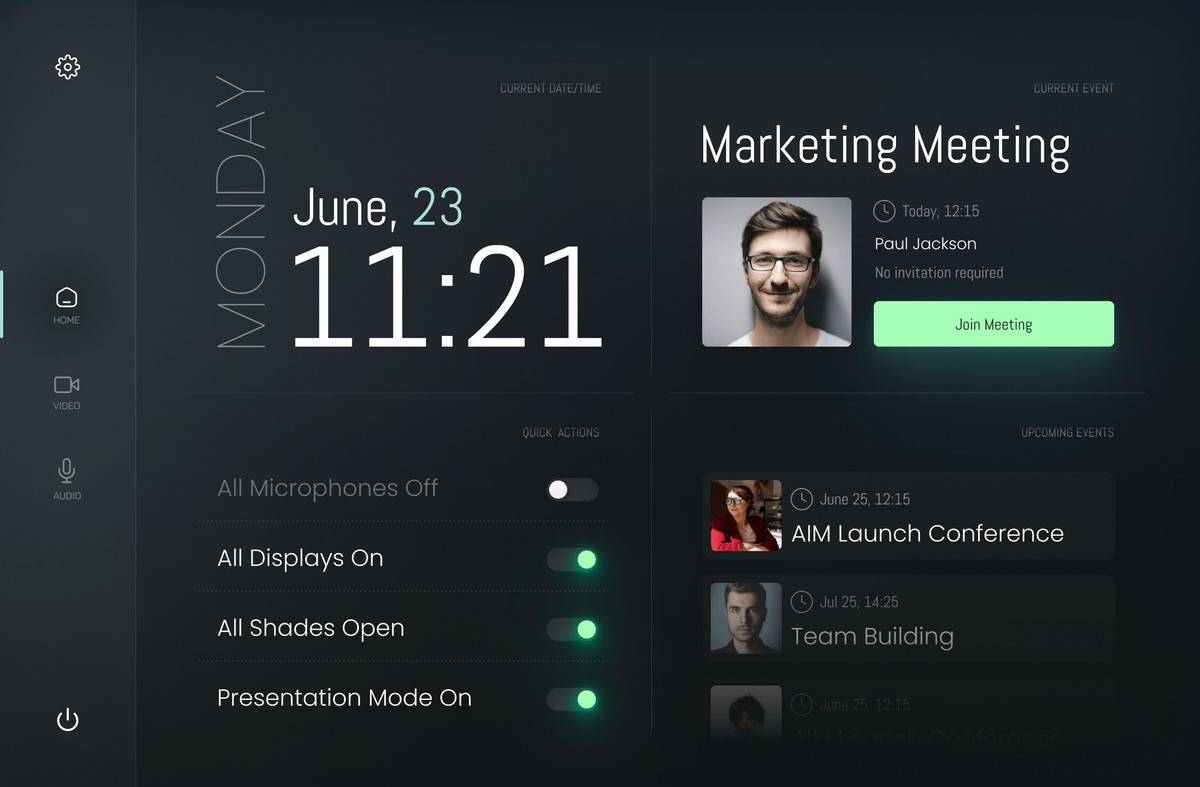
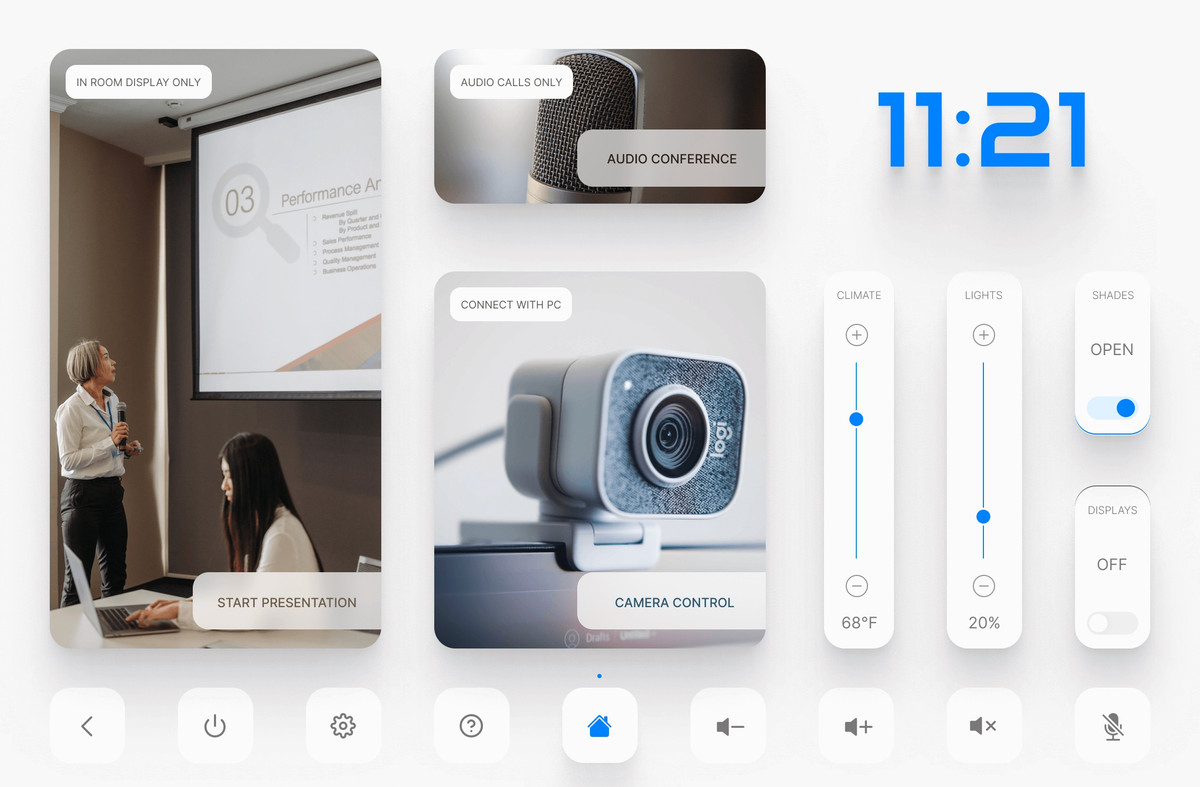
    • Design custom interfaces with drag-and-drop ease.
    • Control a range of devices – like DoorBird intercoms – from one hub.
    • Automate workflows for a smarter, more efficient setup.

    Think of AVstudio as the brain that ties your tech together, making it ideal for integrators and end-users who want total control without the complexity.

    The Power of Integration

    So, what happens when DoorBird and AVstudio join forces? You get a security and control solution that’s greater than the sum of its parts. Our DoorBird Integration Guide walks you through the process, highlighting:

    • Simple Setup: Connect your DoorBird device to AVstudio in just a few steps.
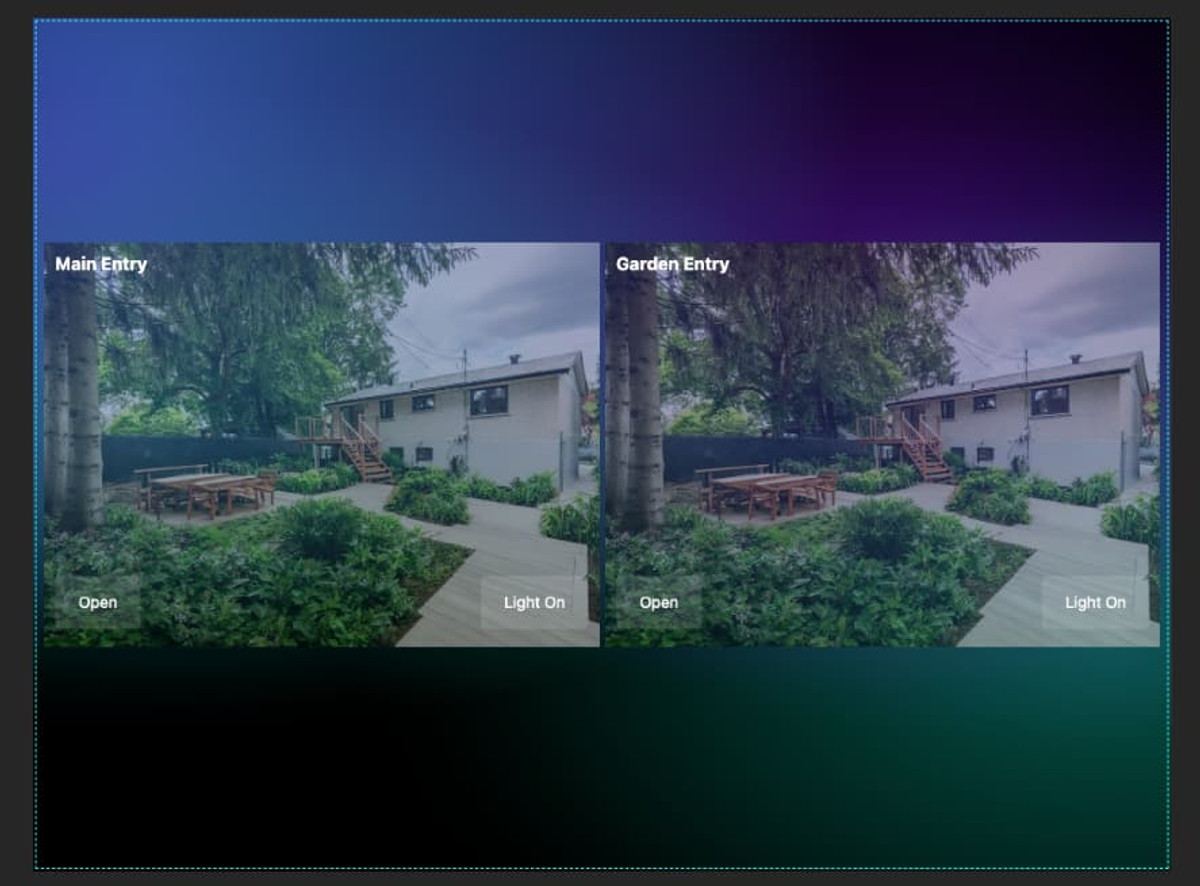
    • Unified Control: View live feeds, talk to visitors, and unlock doors—all from AVstudio’s interface.
    • Tailored Experience: Customize the system for a single home or a sprawling commercial space.
    • Reliability: Pair DoorBird’s top-tier hardware with AVstudio’s intuitive software for a setup you can trust.

    This integration isn’t just about convenience—it’s about elevating how you interact with your space.

    Why It’s a Game-Changer

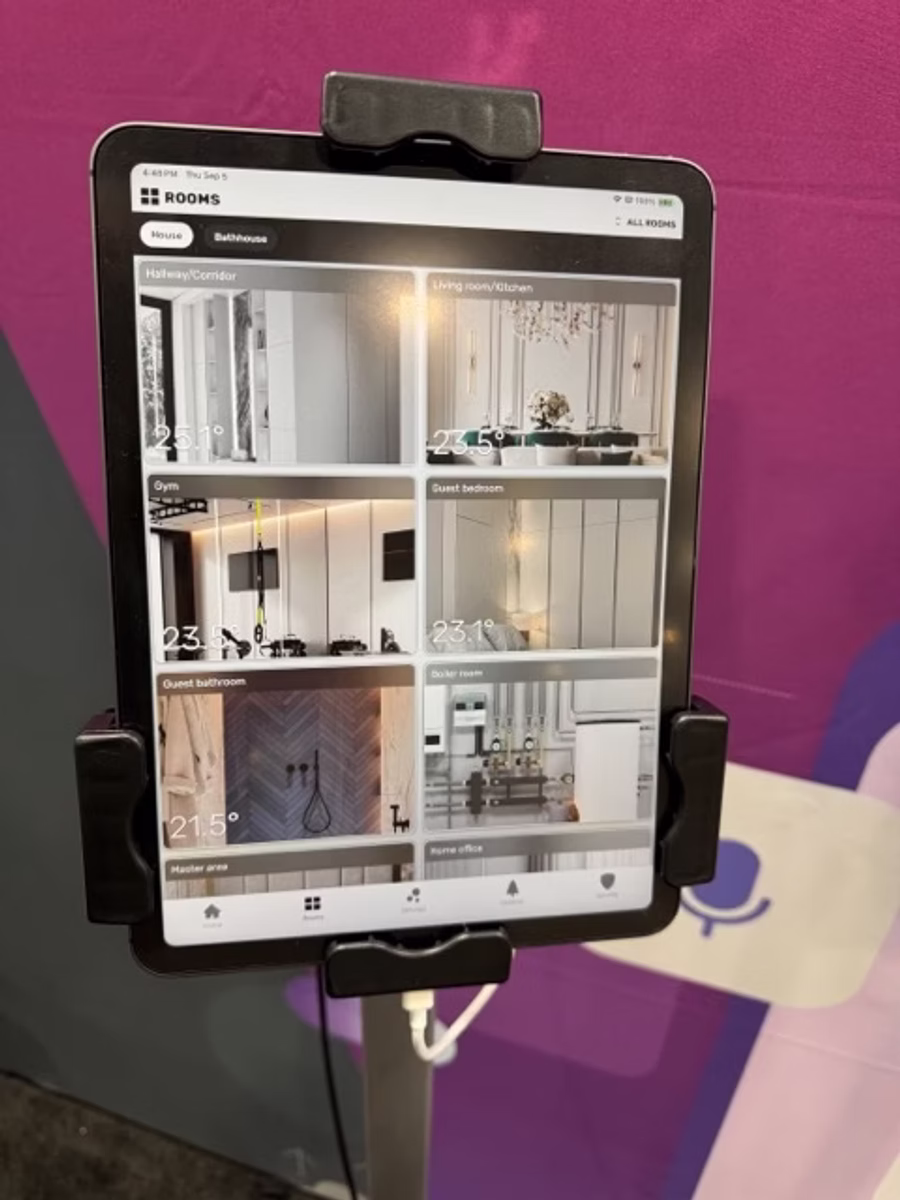
    Imagine this: A visitor rings your DoorBird intercom. You check the video feed on your phone via UI created in AVstudio, confirm it’s your guest, and unlock the door – all without leaving your couch or your office halfway across town.

    For businesses, it’s even more powerful: manage multiple entrances, automate access, and keep everything in sync with your AV systems. It’s smart security, simplified.

    Get Started Today

    Ready to bring this dynamic duo to your doorstep? Dive into the full DoorBird Integration Guide in the AVstudio Knowledge Base. You’ll find everything you need – step-by-step instructions, tips, and best practices – to make the most of DoorBird and AVstudio.

    Whether you’re a tech-savvy homeowner or a professional integrator, this integration is your ticket to a smarter, safer environment.

    Final Thoughts

    Bird Home Automation GmbH and AVgator Inc. have each brought something special to the table with DoorBird and AVstudio. Together, they’re transforming how we secure and manage our spaces.

    Visit doorbird.com to explore the hardware, and check out avstudio.app for the software that ties it all together.

    Let us know how this integration works for you—we’d love to hear your story!

  • Optimized Proxy Server for Seamless AV Integration | AVgator AV Studio

    Optimized Proxy Server for Seamless AV Integration | AVgator AV Studio

    Proxy servers play a vital role in managing and routing network traffic, offering solutions for load balancing, caching, and enhanced security.

    Our proxy servers is meticulously designed to be lightweight, efficient, and highly customizable. It supports both HTTP and HTTPS protocols and comes equipped with features like keep-alive requests, logging, and robust CORS handling. Additionally, it allows you to use third-party APIs directly in the UI or AVgator®Studio, even if those APIs don’t support CORS or HTTPS.

    Key Features

    • Cross-Platform Compatibility: Supports Windows, macOS, Raspberry Pi, and Linux.
    • HTTP and HTTPS Support: Handles both HTTP and HTTPS traffic.
    • Keep-Alive Requests: Maintain uninterrupted connections automatically.
    • Configurable Logging: Supports logging to a file with rotation based on file size.
    • Dynamic Configuration Reloading: Automatically reloads configuration changes without restarting the server.
    • CORS Handling: Seamlessly handle cross-origin requests, preflight requests, and more.

    Configuration

    The proxy server is configured using a JSON file. Here’s an example configuration file (config.json):

    {
    	"hosts": [
    		{
    			"prefix": "hostone",
    			"auth": {
    				"type": "crestronHome",
    				"token": "NgPkQG2zc5Wn",
    				"url": "https://192.168.254.227/cws/api/login"
    			},
    			"url": "https://192.168.254.227"
    		},
    		{
    			"prefix": "hosttwo",
    			"url": "http://192.168.254.203",
    			"autonomic": {
    				"heartbeat_url":
    				"http://192.168.254.203/api/?clientId=0d933545-fa6a-47fc-90de-0f20db9745ab"
    			}
    		}
    	],
    	"mode": "debug",
    	"log-file": "/var/log/proxy.log"
    }

    Detailed Explanation of the Configuration

    • mode: Specifies the mode of the application. It can be either debug or production. If not specified, it defaults to production.
    • log-file: Specifies the log file name and location. If not specified, it defaults to proxy.log in the binary’s directory.
    • hosts: An array of host configurations. Each host configuration includes:
      • prefix: The prefix for the host. Requests with this prefix will be proxied to the specified URL.
      • auth: The authentication configuration. If the type is crestronHome, the token and url fields are required. crestronHome is a specific type of authentication used for Crestron Home systems.
      • autonomic: The autonomic configuration. If specified, keepalive requests will be sent to the heartbeat_url every 20 seconds. autonomic refers to the Autonomic music server
      • url: The URL to proxy requests to.

    Running the Proxy Server

    You can run the proxy server with the following command:

    ./proxyserver

    Make sure the configuration file (config.json) and SSL certificates are in the appropriate directories as expected by the program.

    You can choose our prepared Proxy Server for your OS to create AV projects in AVStudio.

  • RTSP to HLS repacking service

    RTSP to HLS repacking service

    RTSP to HLS

    RTSP (Real-Time Streaming Protocol) is widely used for live video streaming, especially in IP cameras and surveillance systems. However, RTSP isn’t natively supported by most web browsers, making it less versatile for modern applications.

    On the other hand, HLS (HTTP Live Streaming) is a browser-friendly protocol supported across devices and platforms.

    By leveraging FFmpeg and Nginx, you can efficiently repack RTSP streams into HLS for seamless streaming. Here’s how this powerful duo works.

    What is FFmpeg?

    FFmpeg is a robust multimedia framework capable of processing, converting, and streaming audio and video in various formats. It plays a crucial role in transforming RTSP streams into HLS playlists (.m3u8).

    What is Nginx?

    Nginx is a high-performance web server and reverse proxy that serves as the delivery mechanism for the HLS files generated by FFmpeg. It ensures efficient file hosting, supports cross-origin requests, and scales to handle many simultaneous viewers.

    How FFmpeg Helps Repack RTSP to HLS

    FFmpeg repackages the RTSP stream into the HLS format without re-encoding, which saves computational resources and reduces latency.

    Use FFmpeg to process the RTSP input and generate HLS segments.

    Example Command

    ffmpeg -i rtsp://admin:Multimedia@10.14.25.151:8554/ch01 \
           -c:v copy -c:a copy -f hls -hls_time 1 -hls_list_size 6 \
           -hls_time 1 -hls_list_size 6 -hls_flags delete_segments \
           /var/www/streams/AV05SD082a.m3u8

    Key Parameters:

    • -c:v copy:Copies the video codec without re-encoding.
    • -c:a copy:Copies the audio codec without re-encoding.
    • -hls_time:Sets the duration (in seconds) of each HLS segment.
    • -hls_list_size:Defines the number of segments in the playlist.

    FFmpeg continuously processes the RTSP stream and generates a live.m3u8 playlist and media segments.

    How Nginx Serves HLS Streams

    Nginx acts as the web server that delivers the HLS files to clients. Configure Nginx to serve HLS files with CORS support.

    Configuration File Location: /etc/nginx/sites-enabled/strapi.conf

    Sample Configuration

    server {
        listen 80;
        server_name 10.14.25.18;
    
        location /streams/ {
            types {
                application/vnd.apple.mpegurl m3u8;
                video/mp2t ts;
            }
            root /var/www;
            add_header Cache-Control no-cache;
            add_header Access-Control-Allow-Origin *;
        }
    }
    • The types block specifies MIME types for .m3u8 and .ts files.
    • The Access-Control-Allow-Origin * header supports cross-origin requests.

    Restart Nginx after configuration

    sudo systemctl restart nginx

    Clients can now access the HLS stream through a URL like:

    http://10.14.25.18/streams/stream.m3u8

    Conclusion

    Repacking RTSP streams into HLS using FFmpeg and Nginx is an effective solution for delivering high-quality video streams to a wide range of devices. This setup ensures compatibility, scalability, and efficiency, making it ideal for applications like IP camera streaming, live broadcasting, or multimedia projects.

    With HLS support, AV Studio allows developers to create projects without the need for third-party plug-ins. Just integrate into your project AV Studio a video element that supports HLS playback.

  • Unlocking Cross-Origin Communication: CORS Policies in HTML5 Interfaces

    Unlocking Cross-Origin Communication: CORS Policies in HTML5 Interfaces

    Cross-Origin Resource Sharing (CORS) is a vital security mechanism in web technologies, including HTML5-based interfaces created with Crestron Construct, Crestron CH5, or AVGator® Studio for Crestron control systems. It ensures that requests from a control interface (e.g., a Crestron panel or Crestron One on iPad) to external servers or APIs are handled securely.

    While similar to traditional web applications, the use of CORS in Crestron interfaces has its specific challenges and solutions due to the hardware and network environments involved.

    Cross-origin requests

    How CORS Works

    When an HTML5 interface sends a request to an external API or server, the browser enforces the same-origin policy. This policy blocks requests to different domains, ports, or protocols unless the server explicitly allows it via headers like Access-Control-Allow-Origin. If these headers are not present or invalid, the response is blocked.

    Simple vs. Preflighted Requests

    Simple Requests:These include GET, POST, or HEAD requests with safe headers. In a smart home environment, for example, fetching status updates from an API for lighting control can succeed if the third-party API responds with an appropriate Access-Control-Allow-Origin header.

    Non-Simple Requests (Preflighted):If the request includes custom headers or uses HTTP methods like PUT or DELETE, the browser sends a preflight OPTIONS request. This checks if the server permits such requests by examining headers like Access-Control-Allow-Methods and Access-Control-Allow-Headers. The preflight is critical for ensuring that interfaces can safely interact with third-party APIs.

    Example Use Case: Lighting Control

    Suppose you are building an interface to control room lighting, and the system relies on a third-party API for device statuses. The HTML5 interface, running on the Crestron touch panel, sends a POST request to the API for status updates:

    Preflight Request:The browser sends an OPTIONS request to check if the server permits such a request. The API must respond with headers like:

    • Access-Control-Allow-Origin: *
    • Access-Control-Allow-Methods: POST

    Actual Request:If the server allows it, the interface proceeds with the POST request, and the response is received and displayed in the control panel.

    Why Proxies Are Important in GUI Development

    During development, CORS issues arise when the interface connects to APIs on different origins. For instance:

    • The HTML5 interface running on https://avstudio.app may attempt to communicate with an API hosted at http://192.168.4.4
    • Without proper CORS configuration on the server, the browser will block these requests.

    A proxy server helps circumvent this by acting as an intermediary. Developers can route requests through the proxy, which communicates with the API and ensures the necessary CORS headers are included. This approach simplifies testing and allows the interface to function seamlessly without requiring server-side configuration changes.

  • Crestron Home Custom UI (Webinar AVstudio October 09, 2024 highlights)

    🔍 Demonstration: Integrating Crestron Home with AVgator® Studio using Data Sources

    In this video, we demonstrate how AVgator® Studio interacts with Crestron Home using data sources to enable seamless control and monitoring. You’ll see how changes made in Crestron Home reflect instantly in AVgator® Studio, showcasing the power of integration.

    💡 What’s Covered in This Demonstration:

    • Connecting to the Crestron Home API and retrieving room data

    • Controlling lights directly from AVgator® Studio

    • Renaming a room in the Crestron Home App and reflecting the change in AVgator® Studio

    • Explanation of data sources as structured lists with parameters for control and automation

    • Overview of CORS proxy servers and their role in enabling custom UI designs

    • How AVgator®Studio supports custom UI development for Crestron Home

    🚀 Want to Build Custom UIs for Crestron Home?

    It’s possible to create your own custom designs using AVgator®Studio and a proxy server. Contact us to get started with an example setup, or stay tuned for appliance-based solutions coming soon!

    💬 Need Help? Reach Out Anytime!

    #CrestronHome #AVgatorStudio #CustomUIDesign #HomeAutomation #APIDemonstration #AVIntegration

  • Summary of Workshop Day 1 – Mastering Custom UI Design with AVstudio (Oct 18, 2024)

    Summary of Workshop Day 1 – Mastering Custom UI Design with AVstudio (Oct 18, 2024)

    Overview:

    In the first session of the 2024 workshop series, participants were introduced to the core functionalities of AVstudio and its use in Crestron control systems. The workshop focused on project creation, connecting to control systems, troubleshooting common issues, and using AVstudio’s live preview feature for real-time testing.

    Key Topics Covered:

    1. Project Setup and Connectivity:

    • Creating a project from scratch
    • Configuring project settings, including IP addresses and WebSocket tokens
    • Connecting to control systems and addressing certificate challenges

    2. Troubleshooting and Security:

    • Handling common connection errors
    • Using browsers for debugging and maintaining user sessions
    • Discussing the importance of secure certificates

    3. Customizing UI Elements:

    • Creating and customizing buttons to control devices
    • Using feedback signals to monitor button status
    • Developing pop-ups and navigation elements

    4. Adaptive Design and Live Preview:

    • Demonstrating responsive design features for various resolutions
    • Using the live preview feature for real-time adjustments
    • Introducing containers for headers, footers, and widgets

    5. Advanced Mechanics:

    • Implementing variables and actions for dynamic content updates
    • Using page modes to switch layouts based on user interaction


    Next Steps for Participants:

    • Practice creating projects and connecting to control systems
    • Experiment with responsive design and adaptive modes
    • Explore variables, actions, and creating pop-ups in AVstudio
    • Test project uploads to Crestron processors and access them via the web

    The upcoming workshop is scheduled for November 1, 2024, at 11:00 AM.

  • How AVgator® Studio’s Adaptive Feature is Changing the Game at CEDIA 2024

    How AVgator® Studio’s Adaptive Feature is Changing the Game at CEDIA 2024

    If you’ve been following the buzz around CEDIA 2024, you’ve probably heard the excitement about AVgator® Studio’s game-changing new features—especially the introduction of our “Adaptive” feature. But what does this mean for AV programmers? Get ready, because AVgator® Studio is about to transform the way AV interfaces are built and designed!

    Luxury User Interfaces

    Unmatched Flexibility for Programmers

    At AVgator® Studio, we’ve always focused on providing the best tools to empower programmers, and our “Adaptive” feature takes this commitment to the next level. Now, programmers have the freedom to choose between responsive, adaptive, or a combination of both when designing their pages. This powerful flexibility allows you to craft user interfaces that not only look great but also perform seamlessly across any device or screen size.

    How Adaptive Page Layout Works

    Our new adaptive page layout gives you the ability to arrange elements manually by dragging them into place, giving you full creative control. What’s even more exciting is that this layout can still respond to different screen sizes—allowing the elements to adjust based on the device resolution. The result? An adaptive layout that combines the best of custom design and responsive functionality. Thus there is no need to manually adjust the layout’s appearance based on different devices and their orientations.

    Let’s say “no” to endless rearrangements of elements!

    Adaptive page

    Curious about how it works in detail? Wait for the release and you’ll be pleasantly surprised. We’ve successfully retained the familiar approach for developers while enabling the creation of a single layout that adapts to any size.

    How Responsive Page Layout Works

    The responsive page layout, built on the flexbox CSS model, is designed to handle dynamic changes in screen size. All containers and elements on the page automatically adjust to fit various devices, making the layout fluid and flexible. The choice is yours: go adaptive, responsive, or even combine the two for ultimate versatility.

    Responsive page

    Community-Driven Innovation

    We’re also excited to showcase some of the user interfaces that have been contributed by our community of AV programmers at CEDIA 2024. These thoughtfully crafted templates represent a new wave of innovation, proving that collaboration is a driving force behind AVgator® Studio’s rapid growth and success.

    Community Programmer Contributions

    Luxury User Interfaces Across Platforms

    One of the major highlights of our CEDIA 2024 showcase is the introduction of Luxury User Interfaces. These templates are designed to work seamlessly on both iPad and Android devices, demonstrating the power and versatility of AVgator® Studio’s platform. The smooth transitions between devices highlight how our technology offers a harmonious user experience, no matter the platform.

    User Interfaces

    Shaping the Future of AV Tech

    AVgator® Studio isn’t just showcasing the future of AV technology at CEDIA 2024—we’re actively reshaping it. With the flexibility of adaptive and responsive layouts, programmers are now equipped to create user interfaces that transcend the traditional boundaries of design. Our tools are not just powerful—they’re transformative, allowing creativity to flourish like never before.

    AV studio Interface

    In Conclusion: A Revolution in AV Programming

    AVgator® Studio’s “Adaptive” future is more than just a new feature—it’s a complete revolution in how AV interfaces are designed. We are writing the new playbook for AV technology, and we invite you to join us in this exciting journey.

    Whether you’re a seasoned industry veteran or someone passionate about the latest in tech innovation, AVgator® Studio’s “Adaptive” future is ready to change the game. Stay tuned for more updates as we continue to push the boundaries of what’s possible in AV design.

  • On the Way to CEDIA Expo 2024. Stay tuned for some exciting announcements!

    On the Way to CEDIA Expo 2024. Stay tuned for some exciting announcements!

    We are excited and eagerly awaiting the start of the exhibition where we will showcase our new treats for AVstudio!

    Looking forward to meeting the exhibition participants and discovering their products. We are also ready to showcase our incredibly cool and hot new features for the AVstudio app. Creating modern interfaces for AV has never been so fast and efficient.

    On the Way to CEDIA Expo 2024

    Take your seats. It’s going to be very exciting.Booth#850.

  • Creating GUIs with AVgator Studio (AVstudio) HTML5 WYSIWYG UI EDITOR

    Creating GUIs with AVgator Studio (AVstudio) HTML5 WYSIWYG UI EDITOR

    To create a user interface on HTML5 for a Crestron control system, you can use a software tool like AVstudio by AVgator® Inc, which is specifically designed for this purpose.

    Here are the basic steps to create a user interface using AVstudio:

    1. Launch AVstudio and create a new project.
    2. Configure the connection to your Crestron control system (e.g., IP address, WebSocket token).
    3. Add UI elements (buttons, sliders, video windows, etc.) to your layout.
    4. Assign join numbers or data bindings to connect interface elements to control system signals.
    5. Use preview mode to test interactions in real time.
    6. Customize layout using Fluid or Static page design approaches.
    7. Save and export your project for deployment.

    AVstudio supports various environments like Crestron One, Android App, PWA, and browsers, so you can create an interface that works across different platforms.

    Additionally, AVstudio provides a built-in smart console and live debugging with a real processor to help you troubleshoot any issues and optimize your interface.

    Dark Huddle HTML5 GUI for Crestron created in Avgator Studio

    AVstudio by AVgator® Inc is an online-based HTML5 editor for creating GUIs for control systems like Crestron. You can access it at the following address: AVgator® Studio 

    Once you log in, you can start creating your project and designing your user interface. If you have any questions or issues, you can also contact support team for assistance.

    Bright Conference Space HTML5 GUI for Crestron created in Avgator Studio

    Bright Conference Space HTML5 GUI

    The difficulty level of creating a GUI in AVstudio will depend on your previous experience with GUI design and HTML5 development. However, AVstudio is designed to be a user-friendly and intuitive tool that requires no coding skills, making it accessible for people who are new to GUI design.

    Riseup HTML5 GUI for Crestron created in Avgator Studio

    Riseup HTML5 GUI

    AVstudio provides a drag-and-drop interface that allows you to select and place various elements, widgets, and controls onto your GUI canvas. You can customize the design and layout of your GUI using a variety of built-in themes, styles, and colors. Additionally, the tool provides a library of pre-built components, including buttons, sliders, labels, and images, that you can use to add interactivity and functionality to your interface.

    Violet Huddle HTML5 GUI for Crestron created in Avgator Studio

    Violet Huddle HTML5 GUI

    If you do have coding skills, you can also add custom CSS and JavaScript to your project for even more flexibility and control.

    Bright Modern Nest HTML5 GUI for Crestron created in Avgator Studio

    Bright Modern Nest HTML5 GUI

    Overall, while there may be a bit of a learning curve to become proficient with the tool, AVstudio is designed to be intuitive and accessible for users with varying levels of GUI design experience.

    Versalles HTML5 GUI for Crestron created in Avgator Studio

    Versalles HTML5 GUI